Summer Flowers in Melbourne: Watercolor Painting in Procreate
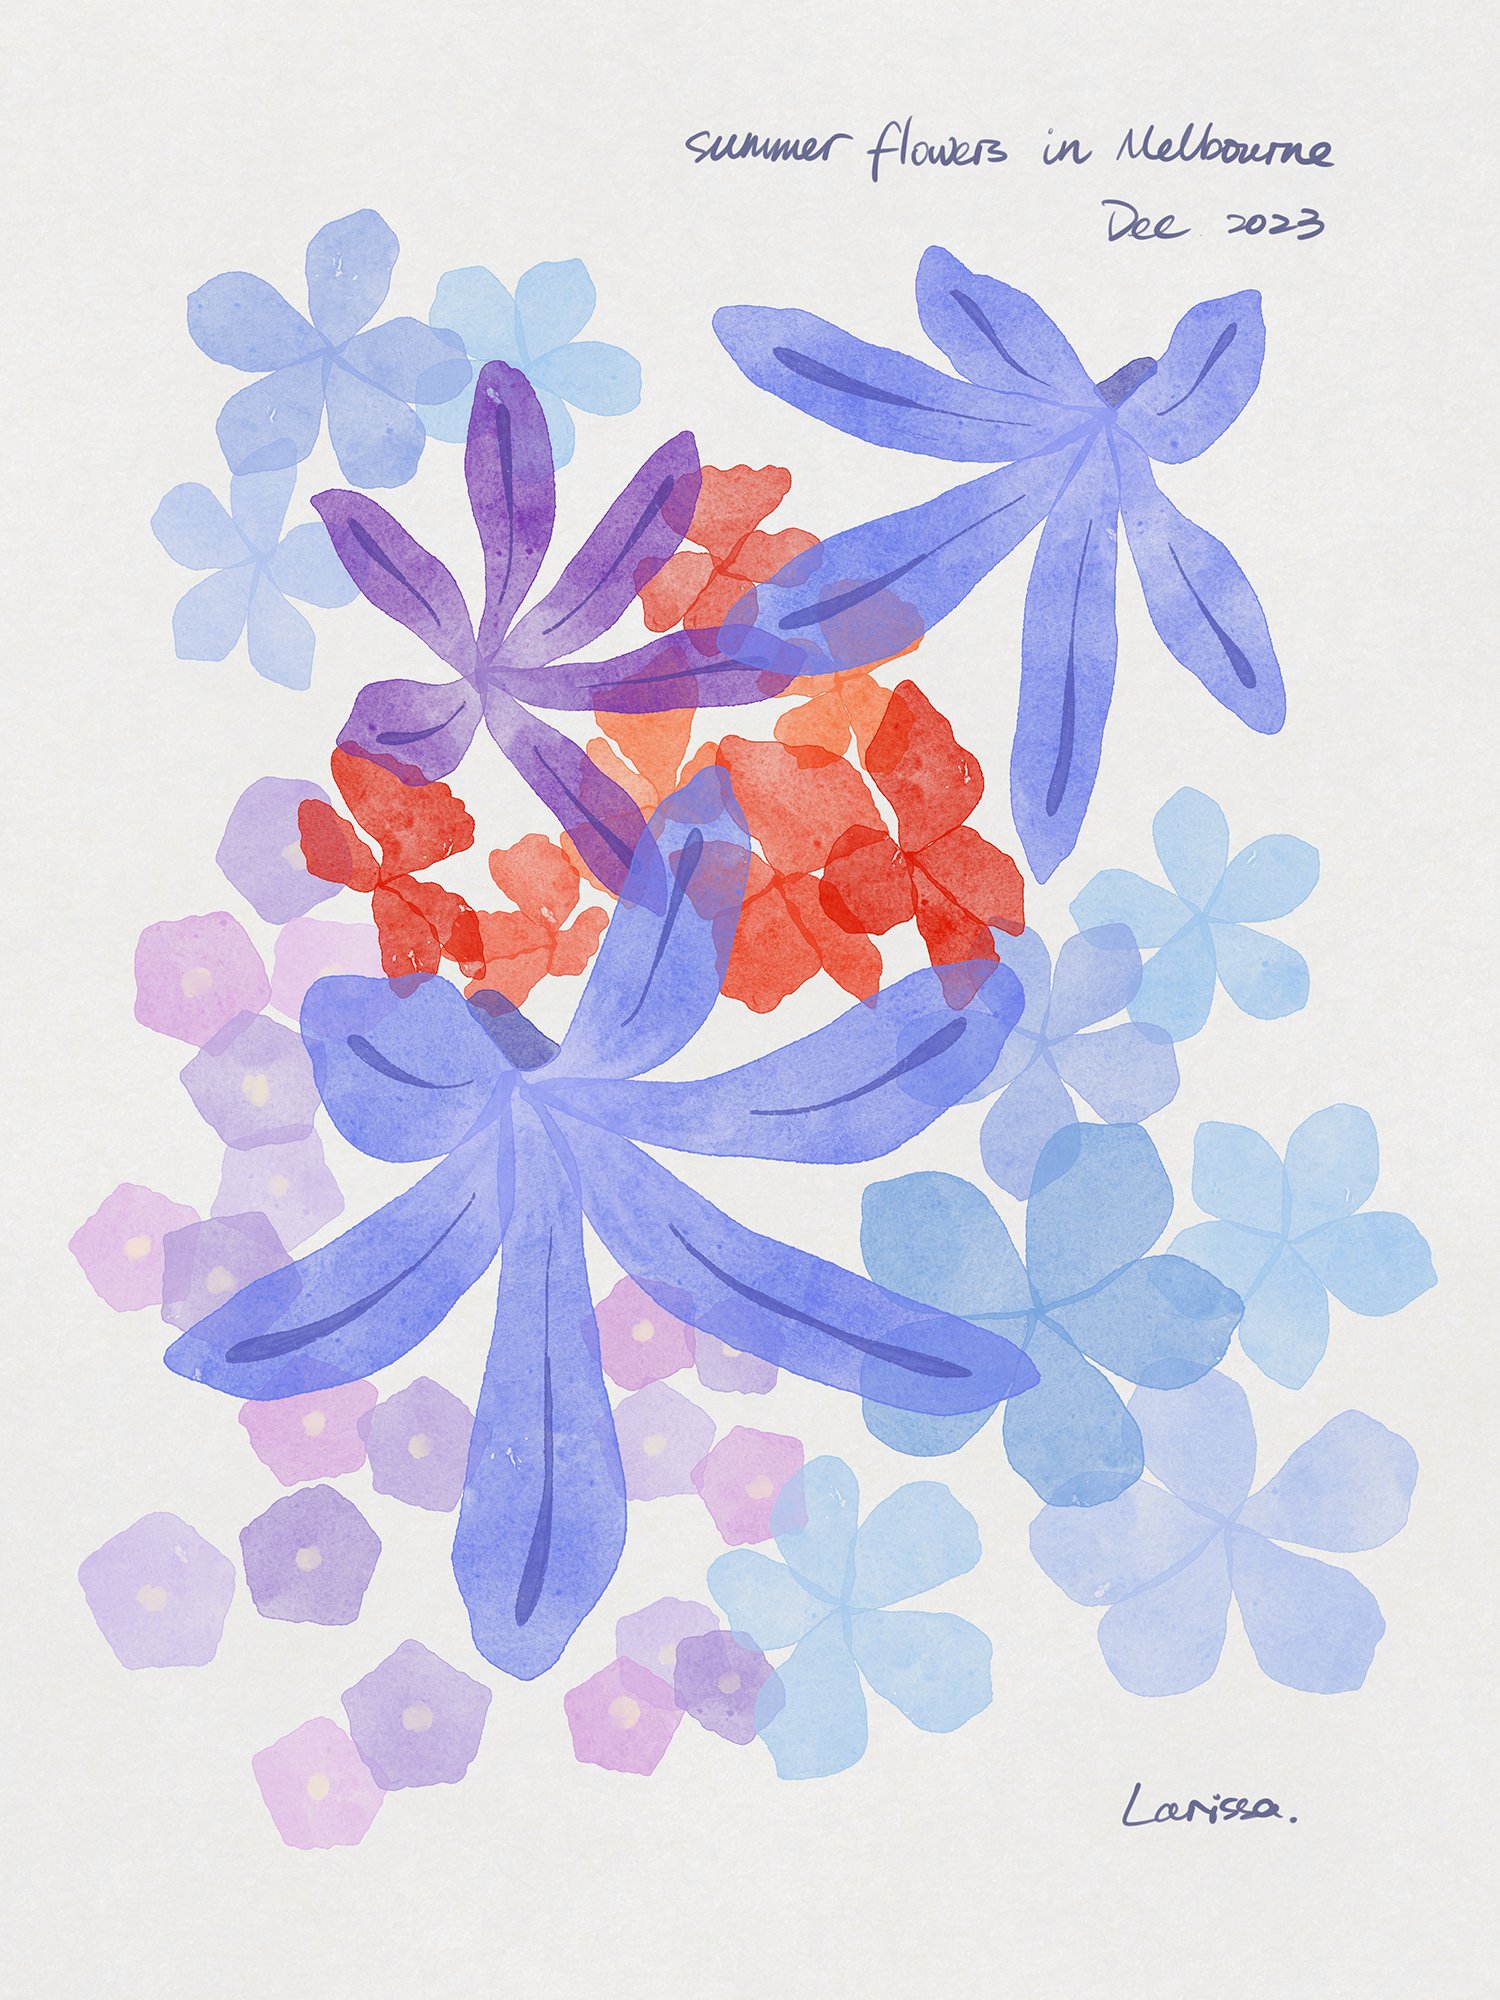
Summer Flowers in Melbourne: Watercolor Painting in Procreate by Larissa Yeung Fung
It is summer here in Melbourne, Australia. I just love seeing all the flowers when going out, especially the ones in purple and blue, because some of them only bloom in summer here. I couldn’t help but take lots of photos of the flowers I like. And I decided to paint these flowers in Procreate using watercolor brushes.

Summer Flowers in Melbourne: Watercolor Painting in Procreate tutorial | the challenge
Sketch Preparation
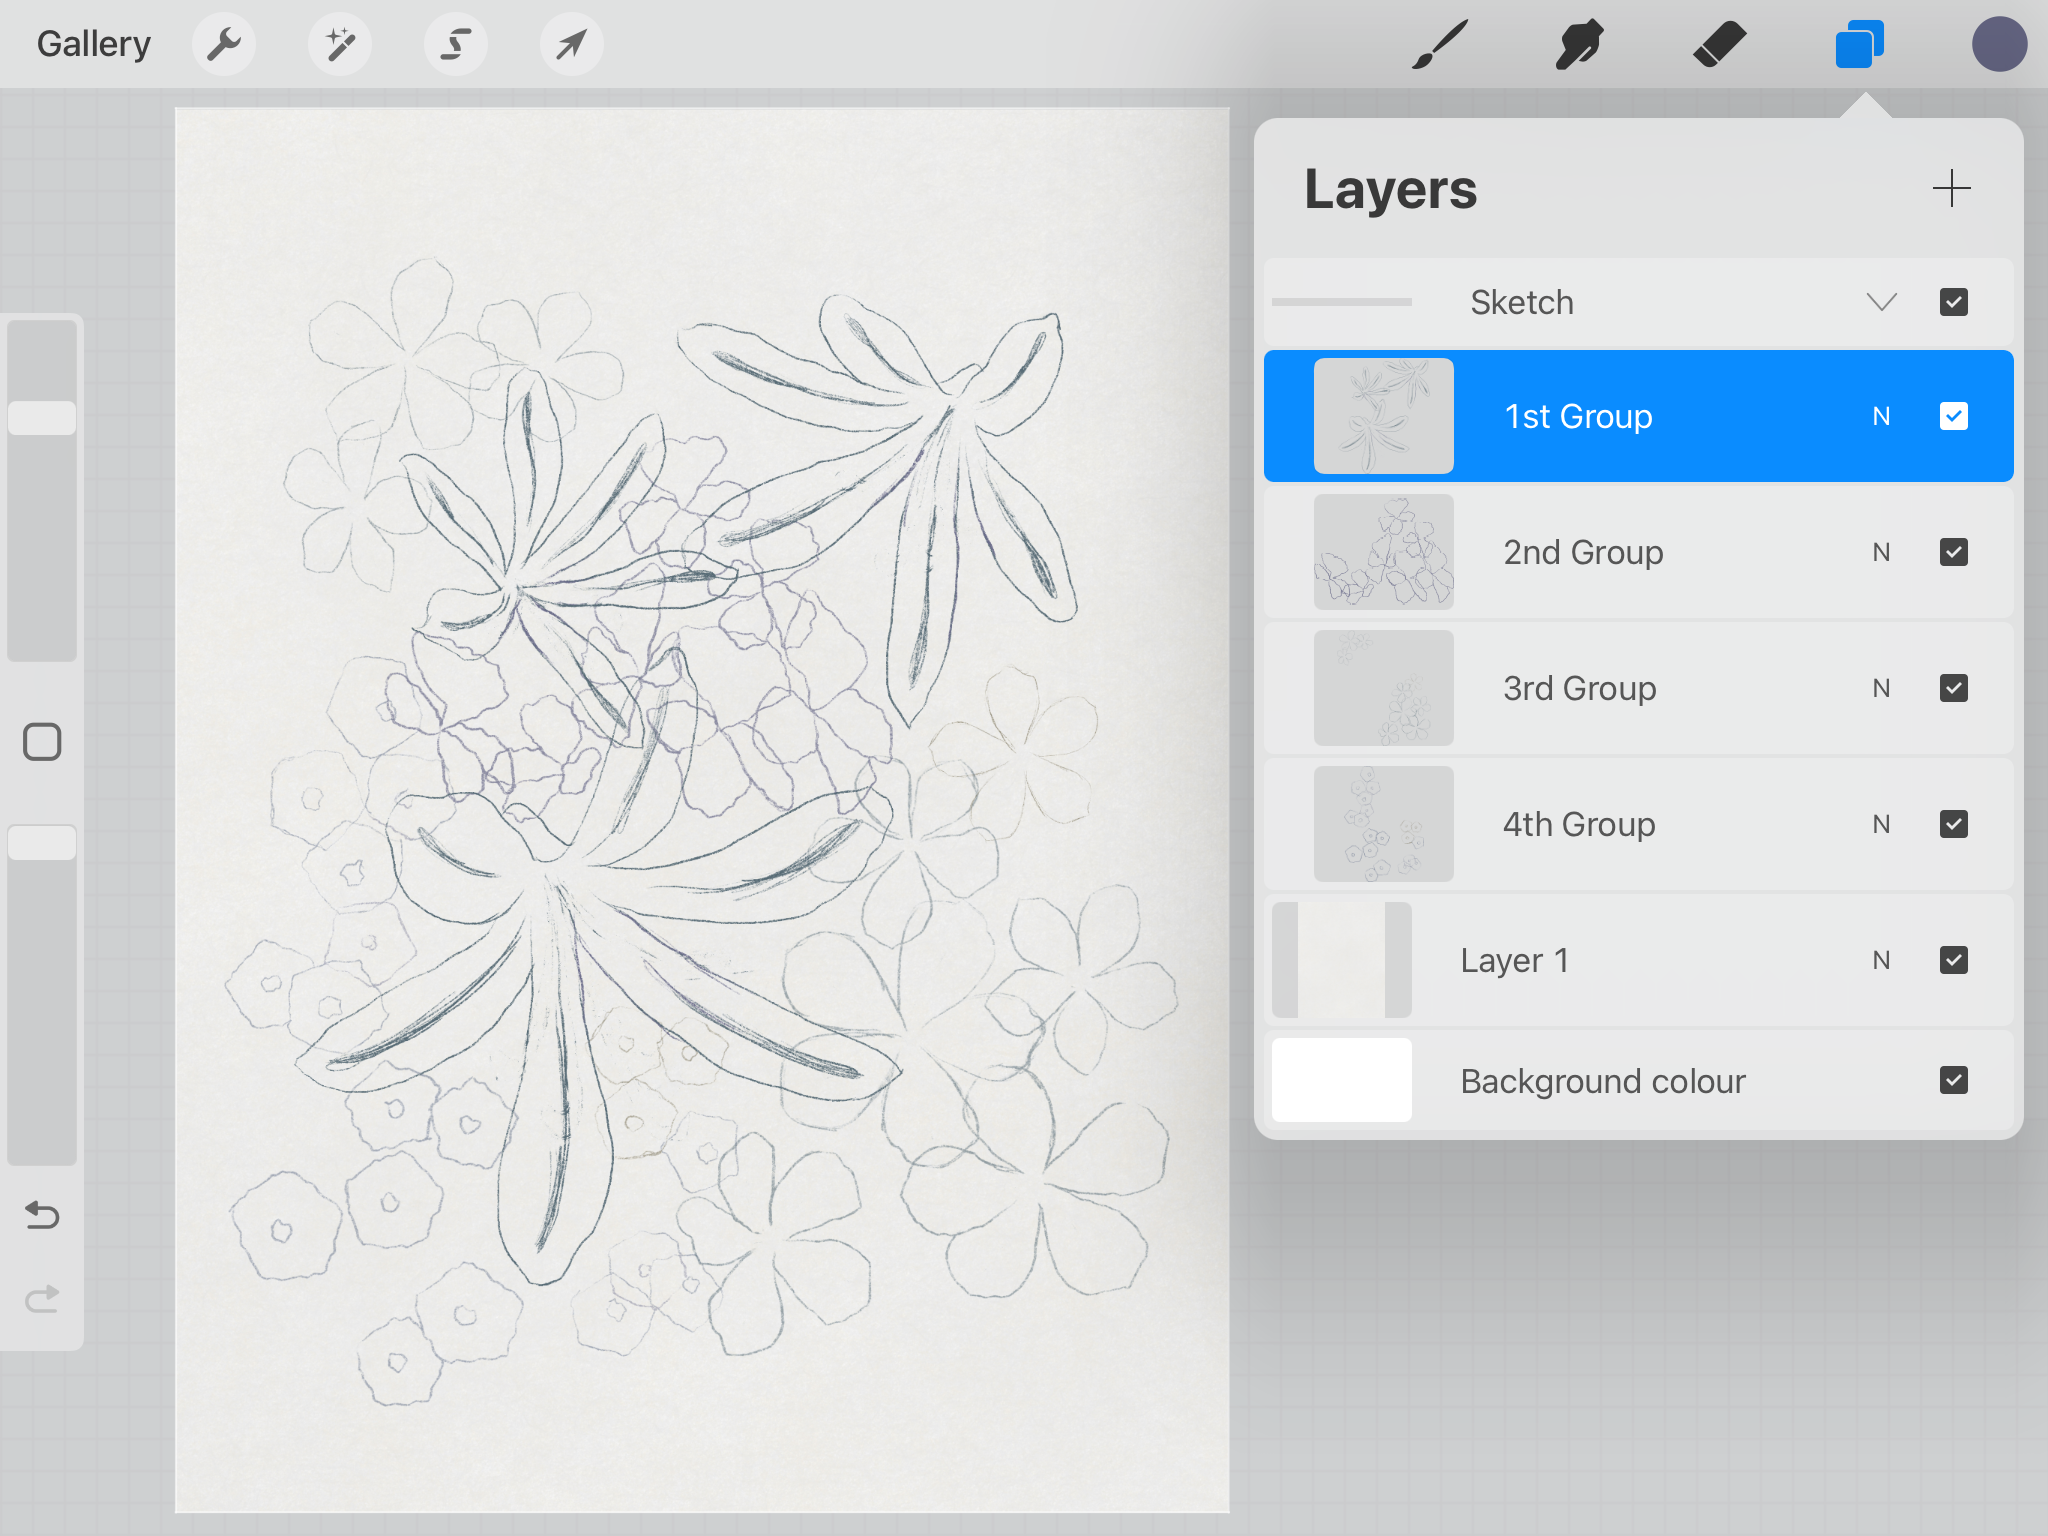
I spent some time drawing flowers from the photos I took and arranging them in a nice composition. Grouping the flowers is essential here. Figuring out what group goes on top and what group is underneath is also important. Doing all this ground work will make your painting process so much easier.
Summer Flowers in Melbourne: Watercolor Painting in Procreate tutorial | sketch
Step 1: Painting the 1st group of flowers
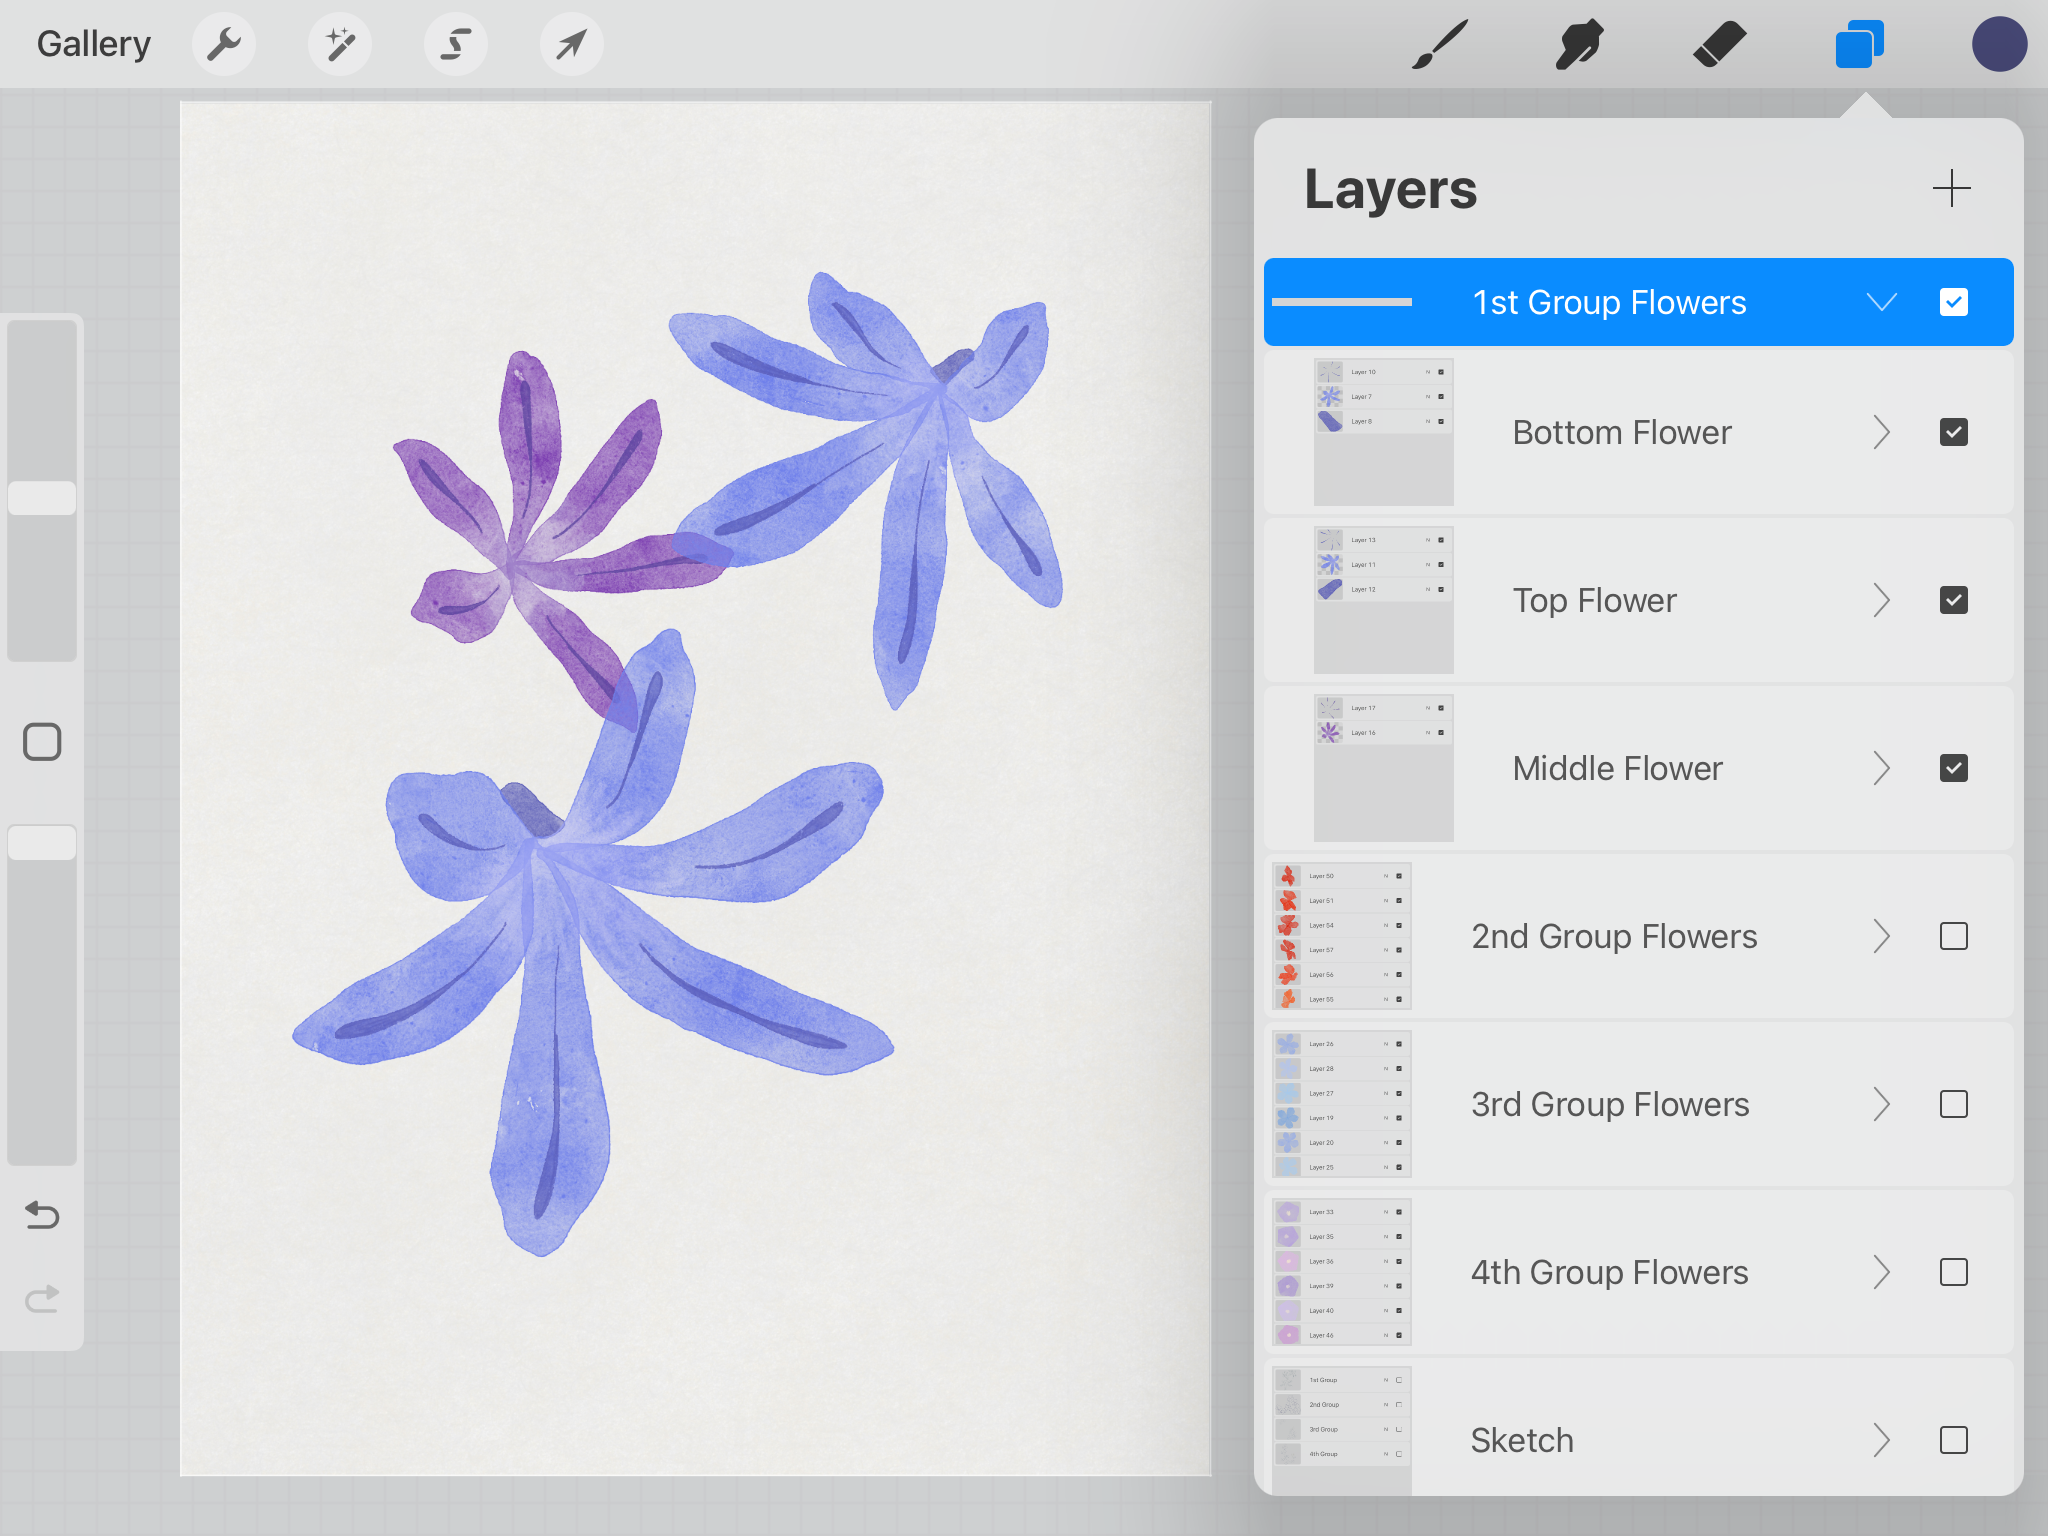
I painted the three big flowers first. They are the stars of the work. I painted them with the most details.
Summer Flowers in Melbourne: Watercolor Painting in Procreate tutorial | step 1
Step 2: Painting the 3rd group of flowers
I skipped the second group of flowers but went straight to the third group, which I’ll explain later. The five-petal flowers are very easy to paint. But how to distinguish these flowers since there are a bunch of them? The key here is to adjust the value of their colors to create a sense of depth, so they don’t look like they are stuck together.
That’s why I put each one of them on a separate layer, so it’s easy for me to adjust the value of their color. I usually use the “Curves” function to achieve this. It’s under the “Adjustments” menu.

Summer Flowers in Melbourne: Watercolor Painting in Procreate tutorial | step 2
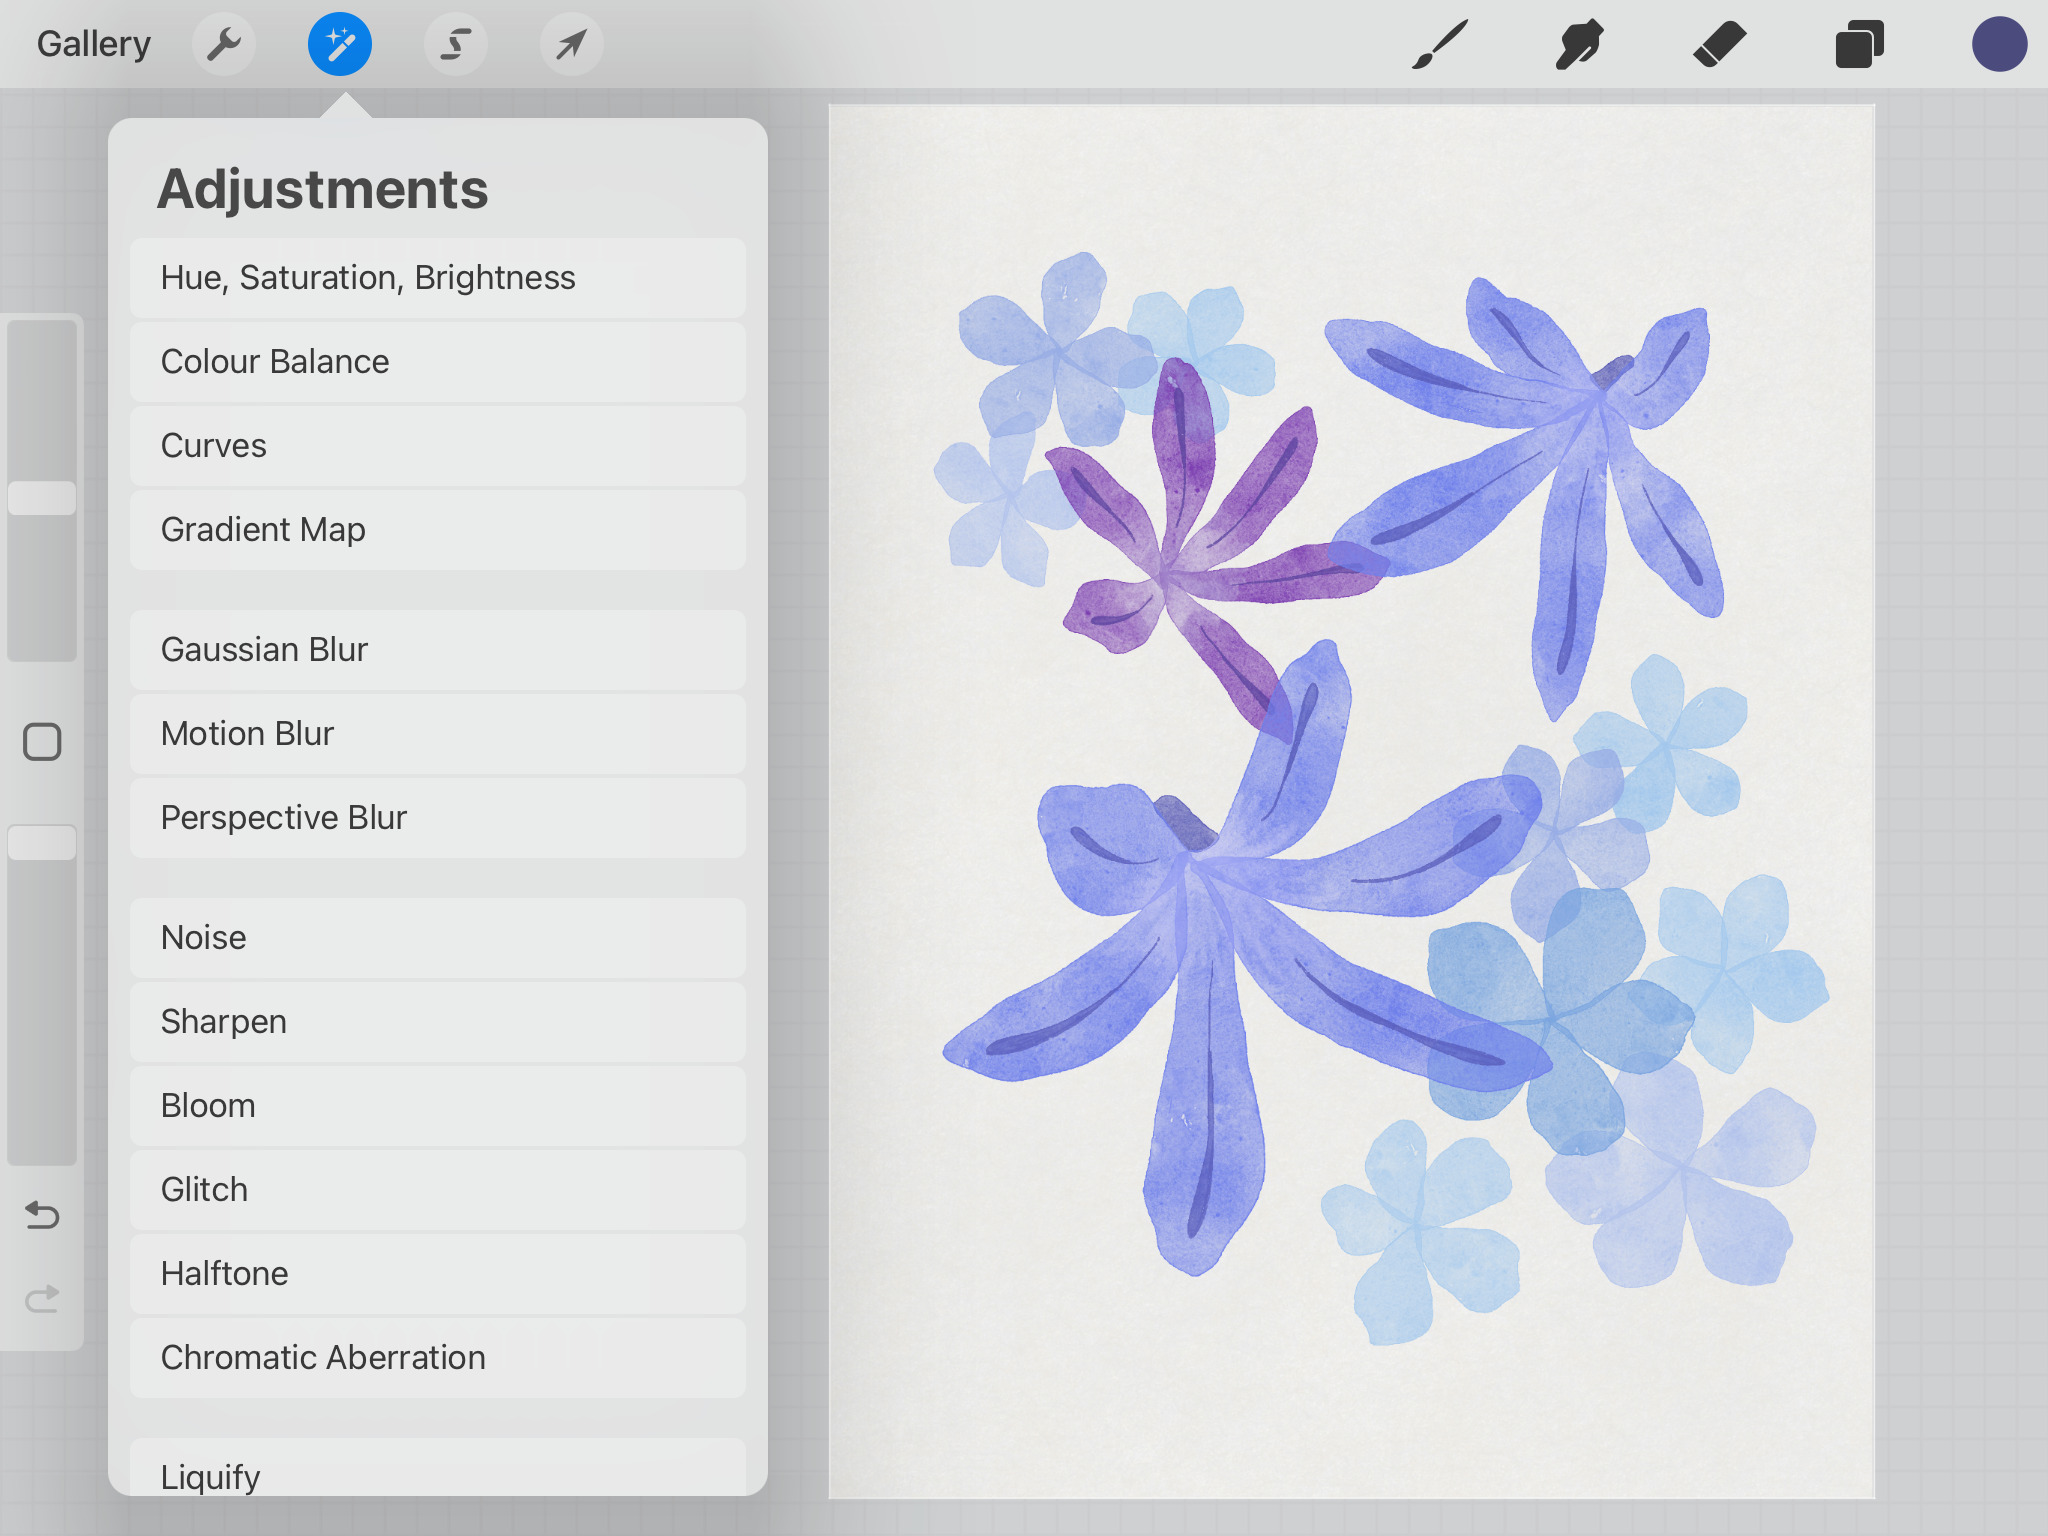
Find the “Curves” function under the “Adjustments” menu
Step 3: Painting the 4th group of flowers
I moved on to paint the fourth group of flowers. Here I used the same methods as the last group: paint each flower on a separate layer, then adjust the value of some of them to create a sense of depth.

Summer Flowers in Melbourne: Watercolor Painting in Procreate tutorial | step 3
Step 4: Painting the 2nd group of flowers
Now it’s time to paint the second group of flowers. You can see the other three groups of flowers are quite similar in color: blueish-purple or reddish-purple. The second group of flowers, however, are in very saturated red. I deliberately picked these flowers to be here so this painting will pop. It may lose focus if all the colors are too similar. And I enjoy painting these flowers last in the process.
Again, using the same methods to paint each flower on a separate layer, and then adjust the value of their color accordingly. If you find using the “Curves” function doesn’t help much, try adjusting the opacity of the layer too. That’s how I managed the sense of depth in this group of flowers.

Summer Flowers in Melbourne: Watercolor Painting in Procreate tutorial | step 4
You can download the color palette and the background paper I used in this work:
Enjoy the tutorial and hope you will be inspired to draw or paint the nature around you.
Happy creating!